While working on generative AI, I recently came across a nice little project for visualizing the images I was generating in the terminal, called term-image. In this little tutorial, I'll show you how to use it in your command line projects. It's nothing particularly useful, but it's cool!
Installation
To install term-image, you will need Python 3.7 or higher.
$ pip install term-image

# or with poetry
$ poetry add term-image

# or with uv
$ uv pip install term-imageUsage
Let’s say for our example that we want to browse a folder and select a file to view in the terminal. We will use the questionary package, so you can also install it in your environment. If you don’t know this library, I have a tutorial on it here.
So let’s see the code for our use case. You can save it in a Python file. I called mine main.py.
import os

import questionary
from term_image.image import from_file


def main():
    image_path = questionary.path("Select image: ", get_paths=lambda: [os.getcwd()]).ask()
    if image_path is None:  # operation cancelled (Ctrl + C)
        return
    image = from_file(image_path)
    image.draw()


if __name__ == '__main__':
    main()
Ok, let’s describe what happens here:
We select a file using the questionary path API. We submit a lambda function to add some preferred paths to suggest, in this case, the current working directory.
If the user cancels the selection, the return value is
None, so we stop there.We use the from_file term-image API to construct an image object to display in the terminal.
We use the
drawmethod of this object to effectively display the image in the terminal.
I don't deal with the case where the file passed is not compatible with what term-image expects, so I'll leave that to you as an exercise.
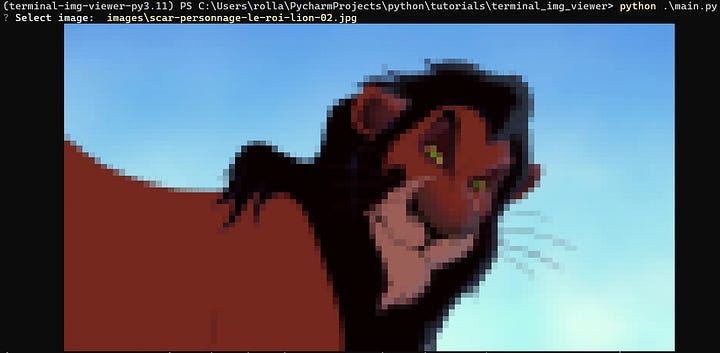
Here is an illustration of what I have on my Windows 11 laptop. On the left, we have the image displayed in the terminal, and on the right, the original image. It is Scar from King Lion for those who don’t know. 🙂


Ok, I feel your disappointment 😂
I was also surprised by this result, I don’t know if it is because of my terminal configuration. Tell me in the comments if you have better results on your terminal. Nevertheless, it is a good way to preview my generated images.
Note that you can also display images coming from HTTP URLs or Pillow objects.
from term_image.image import from_url

image = from_url("http://www.python.org/static/img/python-logo.png")
image.draw()
from PIL import Image
from term_image.image import AutoImage
img = Image.open("path/to/python.png")
image = AutoImage(img)There is a companion project to this one, termvisage, created by the same author. It is a command line interface and textual user interface. To install it, I recommend using pipx. There is a link to my tutorial on this project below.
$ pipx install termvisageNote: Support on Windows is limited, so you may experience issues with this operating system.
The usage is straightforward. You can display a local or remote file like this:
$ termvisage /path/to/localfile.png

$ termvisage http://www.python.org/static/img/python-logo.png
If you have a folder with many images, you can view all images in one like this:
$ termvisage -r folderThis will open a textual user interface. Alas, it is not supported on Windows (at the moment of writing), sorry mates!
This is all for this article, I hope you enjoy reading it. Take care of yourself and see you soon. 🙃


